


Table of Contents
- What You'll Need Before Installing Smart Security Cameras
- Best Outdoor Security Camera Placement Strategies
- Tools Needed for Security Camera Mounting
- Security Camera Mounting Height Recommendations
- Wireless vs Wired Security Camera Installation
- Step-by-Step Installation Process
- Security and Maintenance After Installation
- Legal Considerations and Privacy Laws
- Frequently Asked Questions
Last Updated: September 23, 2026
What You'll Need Before Installing Smart Security Cameras
Before you start to install smart security cameras, gather the right tools and materials for outdoor use. This preparation step saves time and prevents frustration mid-installation.
You'll need a power drill with various drill bits, a level to ensure proper alignment, and a sturdy ladder or step stool for safe access to mounting heights. A screwdriver set, wire strippers, and an adjustable wrench handle most fastening tasks. For wireless cameras, have your Wi-Fi network name and password ready. For wired installations, plan your cable routing in advance.
We recommend checking your camera's mounting template before you buy. This template shows exact hole placement and helps you verify you have the right anchors for your wall type. Different surfaces, vinyl siding, brick, stucco, or wood, require different anchors.
Additional supplies include weatherproof caulk, electrical tape, and cable clips to secure wiring along your home's exterior. A smartphone or tablet is essential for configuring your camera through the manufacturer's mobile app.
Best Outdoor Security Camera Placement Strategies
Where you place your cameras determines how much of your property they actually protect. Poor placement leaves blind spots and defeats the purpose of having cameras at all.
Identifying High-Traffic Entry Points
Focus on the areas where intruders would most likely enter your home. Front doors, back doors, garage entrances, and ground-floor windows are priority zones. Position cameras to capture faces clearly, not just silhouettes. A camera angled downward at 30 degrees typically captures facial features better than one aimed straight ahead.
Driveways and pathways leading to your home also matter. These areas show who approaches your property before they reach entry points. Consider the sun's position throughout the day. Morning sun creates harsh shadows on east-facing walls. Afternoon glare affects west-facing cameras.
Avoiding Obstacles and Glare
Trees, shrubs, and outdoor structures block camera views. Trim branches that hang in front of mounting locations. Position cameras above normal eye level to reduce the chance someone deliberately blocks the lens with a hat or hand.
Reflective surfaces like windows, metal gutters, and wet pavement create glare that washes out video. Test your mounting position at different times of day. Watch how light changes affect the field of view. Adjust placement if necessary to minimize glare impact.
Tools Needed for Security Camera Mounting
Your success depends on having quality tools. Cheap tools slip, strip screws, and waste time.
A cordless drill-driver with adjustable torque prevents over-tightening screws into delicate camera housings. Drill bits should include sizes for pilot holes in your specific wall material. For brick or concrete, use masonry bits. For wood, standard twist bits work fine.
A level ensures your camera points exactly where you intend. Even a slightly tilted camera misses critical angles. A laser level speeds up alignment for multiple cameras.
Anchors matter more than most people realize. Toggle bolts hold better in hollow walls than simple plastic anchors. For solid masonry, use concrete anchors rated for your camera's weight. Check your camera's mounting bracket specifications for the exact anchor type needed.
A stud finder locates wooden framing behind siding. Mounting to studs provides maximum stability, especially for heavier wired camera systems. Cable clips and conduit protect wiring from weather and physical damage.
Security Camera Mounting Height Recommendations
Height affects both what your camera sees and how well it captures identifying details. Too low, and people can tamper with it. Too high, and facial recognition becomes difficult.
Most security experts recommend mounting outdoor cameras 8-10 feet above ground level. This height captures faces clearly while remaining difficult to reach. For doorbell cameras, 4-6 feet works because people naturally look at the camera when approaching.
Adjust height based on what you're monitoring. A camera watching a driveway might go higher than one monitoring a porch. Test angles before finalizing installation. Have someone stand in key areas while you preview the camera's view on your phone.
Optimal Angles for Different Camera Types
Bullet cameras (long, cylindrical) work best at angles between 0 and 45 degrees downward. Dome cameras can point straight down or at angles. Turret cameras rotate in any direction, giving you flexibility.
Pan-tilt-zoom cameras let you adjust angles after installation. These offer the most flexibility but cost more. Standard fixed cameras require correct angle planning before mounting.
Corner mounting creates overlapping coverage zones. Two cameras positioned at opposite corners of your home eliminate most blind spots. This approach requires more equipment but provides comprehensive protection.
Motion Sensor Cabinet Light with →
Wireless vs Wired Security Camera Installation
The choice between wireless and wired affects everything from installation difficulty to reliability.
Wireless Camera Setup and Wi-Fi Connectivity
Wireless cameras connect to your home network without running cables. Installation is simpler and faster. You just mount the camera, connect to Wi-Fi through the app, and you're done.
Strong Wi-Fi signal matters enormously. Cameras far from your router may experience lag or disconnection. Test signal strength at your intended mounting location before installation. Move your router closer if the signal is weak. Some outdoor cameras include range extenders to boost signal.
Wireless cameras need charging or battery replacement. Battery-powered models offer true cable-free installation but require regular maintenance. Some wireless cameras use solar panels to maintain charge indefinitely.
Cybersecurity during setup is critical. Change the default password immediately. Use a strong, unique password combining uppercase, lowercase, numbers, and symbols. Enable two-factor authentication if the manufacturer offers it. Keep your camera's firmware updated by checking the app regularly for updates.
Wired Camera Installation and Power Supply
Wired cameras connect directly to a power supply and network cable. They never lose power or signal due to Wi-Fi issues. Installation requires running cables, which takes more time and planning.
Run cables through conduit to protect them from weather and physical damage. Cable routing along your home's exterior should follow natural paths, down the side of a gutter, along trim, under eaves. Secure cables with clips every 12-18 inches to prevent sagging.
Power supplies for wired systems typically mount near your router or in a garage. These power supplies often include network switches, allowing you to connect multiple cameras to one device. Wired systems are more reliable for continuous surveillance but demand careful installation planning.
Step-by-Step Installation Process
Step 1: Mount the Camera Base and Bracket
Start by marking your mounting location using the manufacturer's template. Hold the template against the wall and mark hole positions with a pencil. Use a level to ensure the template is straight.
Drill pilot holes slightly smaller than your anchors. For masonry, use a masonry bit and take your time. Rushing creates oversized holes that weaken anchor grip. Insert anchors and let them set according to package directions.
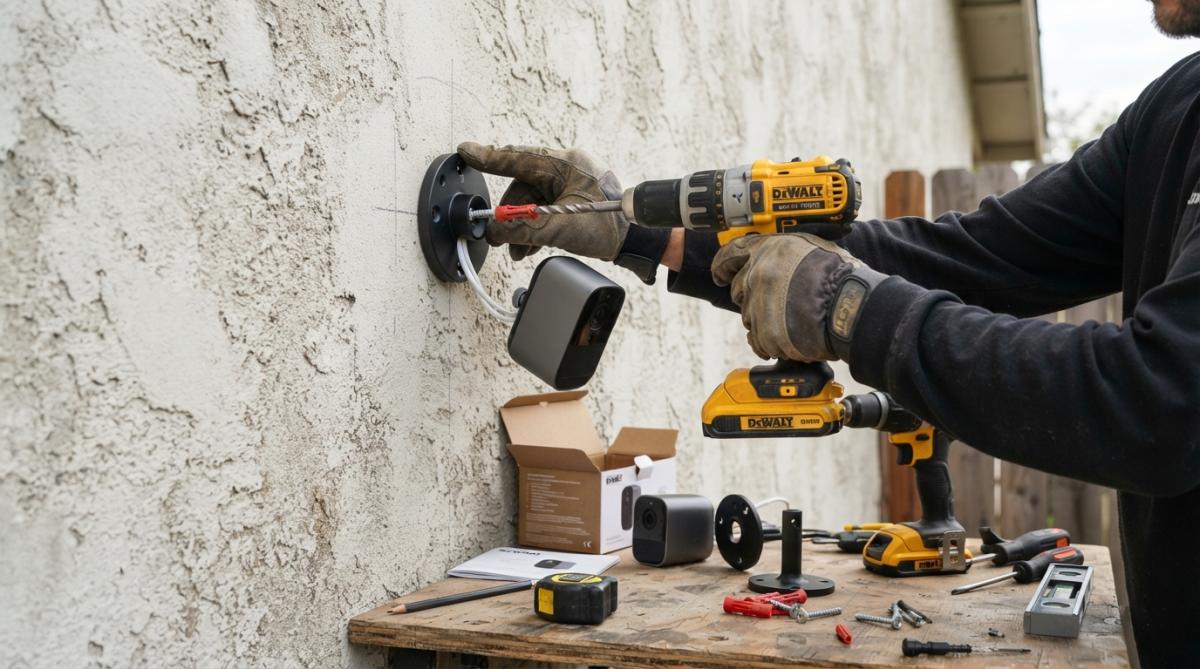
Attach the mounting bracket using the provided screws. Tighten firmly but don't over-torque. Attach the camera to the bracket according to instructions. Ensure it's secure before moving to the next step.
Step 2: Connect Power and Configure Wireless Connectivity
For wireless cameras, download the manufacturer's app before installation. Create an account and add your camera to your network. You'll enter your Wi-Fi name and password during this process.
For wired systems, run network and power cables along your planned route.
Step 3: Adjust Field of View and Test Motion Detection
Pan and tilt your camera to the desired angle. Most cameras allow adjustment through the app or physical rotation at the mount. Frame your target area, entry point, driveway, or yard section.
Security and Maintenance After Installation
Cybersecurity Best Practices During Setup
Change your default password to something unique and strong. Use 12+ characters combining uppercase, lowercase, numbers, and symbols. Never use your home address, birthday, or pet names.
Night Vision Optimization and Maintenance Schedules
Infrared night vision works best when the camera lens is clean. Dust and spider webs scatter infrared light. Clean the lens monthly with a soft, dry cloth. For stubborn dirt, use a lens cleaning solution designed for cameras.
| Maintenance Task | Frequency | Why It Matters |
|---|---|---|
| Clean camera lens | Monthly | Dust blocks infrared and reduces clarity |
| Tighten mounting bolts | Quarterly | Wind loosens hardware over time |
| Update firmware | Every 30 days | Security patches and performance fixes |
| Inspect cables | Quarterly | Weather damage compromises connections |
| Reapply weatherproof caulk | Annually | Prevents water damage behind bracket |
Legal Considerations and Privacy Laws
Recording video on your own property is legal. However, audio recording has stricter rules. Many states require two-party consent for audio recording, meaning everyone being recorded must know they're being recorded.
Frequently Asked Questions
What is the best way to mount security cameras outside?
Mount cameras at least 8-10 feet high on a sturdy surface like a wall corner or soffit overhang. Use a mounting bracket and angle the camera downward slightly to capture faces and entry points. Ensure the mounting template is level, and use appropriate anchors for your siding type. Position cameras to avoid direct sunlight and reflective surfaces that create glare on the lens.
How far can a wireless camera be from the router?
Most wireless security cameras work reliably within 100-150 feet of your router in open spaces. Obstacles like walls, metal, and dense materials reduce signal strength significantly. If your camera is beyond this range, consider a Wi-Fi extender or mesh system to maintain stable connectivity. Check your camera's specifications for exact Wi-Fi range, as models vary.
Do I need a permit to install security cameras on my home?
Most residential security camera installations on your own property do not require a permit. However, some municipalities have restrictions on placement if cameras point toward neighboring properties. Check your local zoning ordinances and homeowners association rules before installation. Privacy laws generally protect your right to monitor your own property, but never record areas where neighbors have a reasonable expectation of privacy.
Is it better to have wired or wireless security cameras?
Wireless cameras are easier to install and don't require cable routing, making them ideal for renters or quick setups. Wired cameras provide consistent power and don't depend on Wi-Fi strength, offering more reliable performance in areas with poor signal. Wired systems also typically support higher video quality and continuous recording. Choose based on your installation flexibility, power availability, and performance needs.


