


Table of Contents
- Step 1: Start with a Pantry Decluttering Checklist
- Step 2: Categorize Your Pantry Staples and Create Zones
- Step 3: How to Maximize Vertical Pantry Storage
- Step 4: Choose the Best Pantry Storage Containers for Small Spaces
- Step 5: How to Organize a Deep Pantry with Limited Space
- Step 6: Label Everything and Maintain Your System
- Step 7: Accessibility and Sustainability Considerations
- Frequently Asked Questions
Last Updated: September 17, 2026
How to organize a cluttered pantry in small spaces requires decluttering, smart storage, and thoughtful placement. Whether you're working with a closet-style pantry, galley kitchen, or limited cabinet depth, the right system transforms chaos into function.
Step 1: Start with a Pantry Decluttering Checklist
Before you buy a single bin or label maker, you need to purge. This is the foundation of any pantry organization system, and skipping it wastes money on containers you don't need.
Check expiration dates and remove expired items
Pull everything out. Check every expiration date. Toss anything past its date.
Most people skip this step, organizing around expired items and wondering why their pantry feels cramped later. Expired goods waste space you can't afford to lose.
Look for:
- Expired spices and baking ingredients
- Old canned goods with dents or rust
- Stale crackers and cereals
- Dried goods that have been open too long
Purge duplicates and items you don't use
Remove duplicates, keep one if you have three half-empty bottles of cooking oil. Be honest about what you eat: donate specialty pasta you won't use and fancy baking flour for recipes you'll never make.
Common items to purge:
- Duplicate condiments and sauces
- Expired spice blends
- Ingredients for recipes you don't cook
- Snacks no one in your household eats
- Broken or damaged containers
Step 2: Categorize Your Pantry Staples and Create Zones
Organize what remains into logical zones to prevent items from scattering and speed up restocking.
Group similar items together
Standard zones for most households:
- Baking supplies (flour, sugar, baking powder, vanilla)
- Grains and pasta (rice, oats, cereal, noodles)
- Canned goods (vegetables, beans, soups)
- Condiments and oils
- Snacks and breakfast items
- Spices and seasonings
Assign zones for easy access and workflow
Place items by frequency of use: high-traffic items at eye level, seasonal items on top shelves, heavy canned goods on lower shelves.
Think about your cooking workflow:
- Baking supplies near your mixer or prep area
- Oils and vinegars near the stove
- Breakfast items at kid-height if you have children
- Snacks on accessible shelves
Step 3: How to Maximize Vertical Pantry Storage
Small spaces demand vertical thinking. Most pantries waste space between shelves.
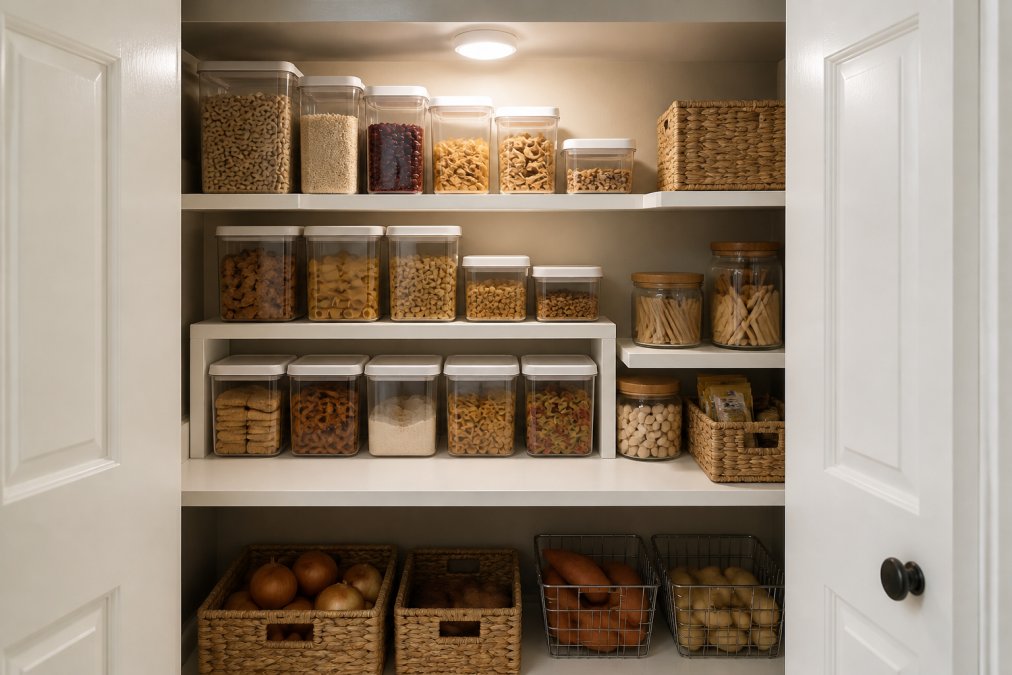
Use shelf risers and stackable bins
Shelf risers double usable space by creating a second level. A riser adds 8-12 inches of height without taking up floor space, the single biggest space-saving move for how to organize a cluttered pantry in small spaces.
Pair risers with stackable bins:
- Clear plastic bins for dry goods (you can see contents without opening)
- Uniform heights so they stack neatly
- Bins that fit your shelf depth exactly
- Stackable design that prevents tipping
Renter-friendly vertical storage: damage-free solutions
If you rent, you can add vertical storage without losing your security deposit.
Adhesive-mounted shelving: Command strips and adhesive brackets hold up to 16 pounds per strip, remove cleanly, and work on painted drywall and tile.
Under-shelf baskets and risers:
- Hang baskets from existing shelves using hooks (no drilling)
- Slide risers onto existing shelves to create a second tier
- Both methods work on rental shelving
Install over-the-door organizers and wall-mounted shelving
Use your pantry door for spices, packets, oils, and lightweight canned goods. If you own your home, slim wall-mounted shelving adds meaningful storage. For renters, test adhesive strips on a small area first; if unsuitable, use freestanding units or over-the-door solutions.
Step 4: Choose the Best Pantry Storage Containers for Small Spaces
The right containers make the difference between a pantry that stays organized and one that slides back into chaos.
Use clear containers for visibility and inventory management
Clear containers let you see contents without opening bins, preventing overbuying and catching low supplies quickly.
Benefits of clear containers:
Motion Sensor Cabinet Light with →
- See contents at a glance
- Spot expiration dates easily
- Know when to restock before you run out
- Take up less visual space than boxes and bags
Decant dry goods into uniform, stackable bins
Decanting, transferring items from original packaging into storage containers, is the secret to a polished, space-efficient pantry.
Decant these items:
- Flour and sugar
- Cereal and granola
- Pasta and grains
- Crackers and chips
- Dried fruit and nuts
- Baking ingredients
Choose containers that:
- Stack securely without tipping
- Seal tightly to keep food fresh
- Fit your shelf dimensions exactly
- Have flat tops (no rounded lids that waste space)
Step 5: How to Organize a Deep Pantry with Limited Space
Deep pantries hide items in the back, causing forgotten stock and duplicate purchases. This is especially problematic for those with mobility limitations.
Use pull-out drawers and lazy susans for accessibility
Pull-out drawers slide out fully for complete access and are essential for elderly family members or anyone with limited reach or bending ability.
Lazy susans work for:
- Spice collections
- Condiment bottles
- Small jars
- Oils and extracts
Organize for specific dietary needs and bulk buying
For specific diets or bulk buying, create zones around your eating patterns. For gluten-free: dedicate a shelf, label clearly, store at eye level. For bulk buyers: use FIFO rotation, label with purchase dates, keep an inventory list. For multiple diets: create separate zones with color-coded labels.
Maximize door storage and under-shelf baskets
Use door storage for spice racks, slim shelves, and hanging organizers. Under-shelf baskets hold snacks, breakfast foods, and lightweight canned goods. Keep items visible and accessible; ensure under-shelf baskets don't create tripping hazards.
Step 6: Label Everything and Maintain Your System
Labels turn an organized pantry into a system that stays organized.
Create a labeling system for rotation and expiration tracking
Label every container with:
- Item name
- Date opened or purchased
- Expiration date (if applicable)
- Reorder threshold (when to buy more)
Label containers and lids to prevent confusion when stacked or in dim lighting.
Consider color-coded labels by category:
- Green for grains
- Blue for canned goods
- Red for spices
- Yellow for baking supplies
Set a monthly maintenance routine
Organize once, maintain monthly. Spend 15 minutes the first Sunday of each month:
- Check expiration dates
- Reorder items running low
- Wipe down shelves
- Reorganize items that shifted
Step 7: Accessibility and Sustainability Considerations
A well-organized pantry works for everyone in your household, regardless of age or mobility. It also respects the environment.
Design your pantry for ergonomic accessibility
Place frequently used items between waist and eye level. For varied heights: kid snacks on lower shelves, heavy items at waist level, occasional items on top. Clear pathways prevent spills and injuries.
Choose eco-friendly storage and organization solutions
Choose glass containers, bamboo risers, stainless steel bins, fabric dividers, or natural wood shelving for durability and reduced waste.
| Consideration | Why It Matters | Solution |
|---|---|---|
| Ergonomic height | Prevents strain and injury | Place frequent items at waist-eye level |
| Accessibility for children | Safety and independence | Lower shelves for kid-friendly items |
| Accessibility for elderly | Reduces strain and falls | Avoid high reaches and deep bending |
| Sustainability | Reduces environmental impact | Choose glass, bamboo, or stainless steel |
| Long-term durability | Saves money and waste | Invest in quality containers |
Frequently Asked Questions
What are the most common pantry organization mistakes to avoid?
The biggest mistakes are keeping expired items, failing to use clear containers so you can't see inventory, and not utilizing vertical space. Many people also skip labeling systems, which leads to forgotten items and wasted food. Avoid overcrowding shelves, air circulation helps preserve dry goods longer. Finally, don't organize by aesthetics alone; prioritize accessibility and food rotation to maintain an efficient pantry.
How should I organize a deep pantry with limited shelf space?
For deep pantries, install pull-out drawers or lazy susans to access items at the back without reaching. Use stackable bins and shelf risers to create vertical layers. Maximize door-mounted organizers for spices, oils, and frequently used items. Under-shelf baskets add storage without taking up floor space. Clear containers let you see everything without pulling items forward, saving time and preventing duplicate purchases.
What's the best way to maximize vertical pantry storage in a small space?
Install adjustable shelving to customize shelf depth and spacing for your items. Use shelf risers and stackable bins to double your vertical capacity. Over-the-door organizers and wall-mounted shelves add storage without eating floor space. Hang a motion-sensor light like the Motion Sensor Cabinet Light to brighten high shelves and make items easier to locate. Keep frequently used items at eye level and heavier items on lower shelves for safety.
How often should I reorganize and maintain my pantry?
Do a quick monthly check to remove expired items, wipe down shelves, and adjust labels. Every 3-4 months, do a deeper inventory and reorganize zones if needed. Before major grocery shopping trips, declutter and restock containers. Seasonal changes (holiday baking, summer snacks) may require temporary zone adjustments. Regular maintenance prevents clutter from returning and keeps your system working efficiently.


